Floor attachment details
Tom Yost's original design
works well. My aim was to reduce the number of
loose parts and reduce assembly time a little. What is shown here is my
second iteration. In the first iteration I simply replaced the nuts
that retained the eight screws that held the floor with SS rivet nuts. I
found a power screwdriver at Wal Mart that used four AA batteries. I
just left the screwdriver in the bag with the boat. I figured that I
could find AA battries anywhere. Still I had to keep track of eight
screws plus the driver.
Note that most of the links go to McMaster-Carr. Some of this hardware
I found at my local Ace hardware store. Believe it or not, this store
(Palo Alto Hardware) has a better selection in stainless than either
Home Depot or Orchard Supply. McMaster is good in that most stuff ships
the same day and they ship for a reasonable price.
In the latest iteration I have replaced the eight screws with four
clevis pins that have a spring loaded ball to retain them. With this
change there are no loose parts needed to attach the floorboards. Here
are pictures.
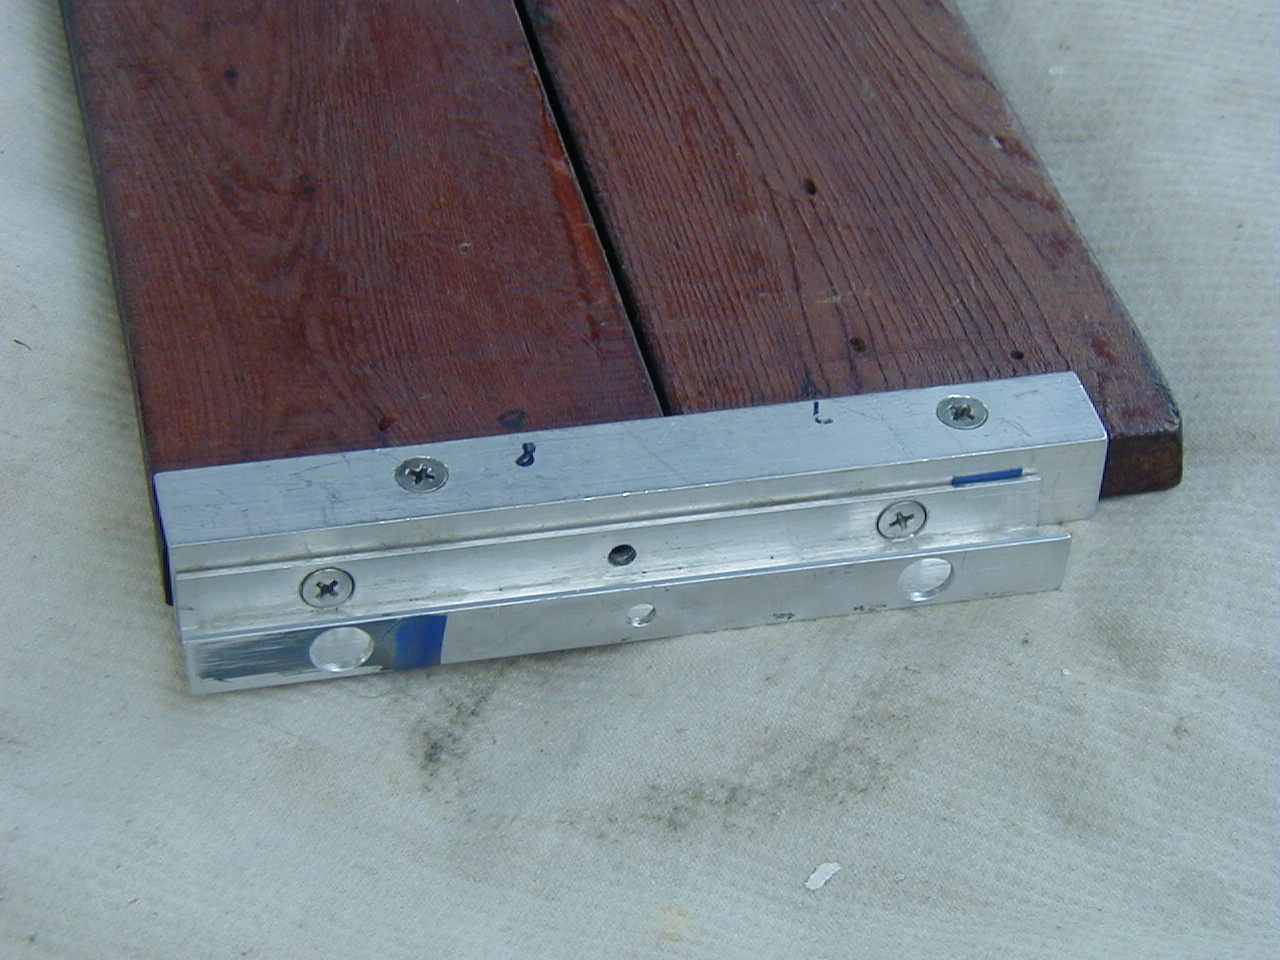
Where the eight screws were I have used 10-24 flat head screws
to perminantly attach the U-section to the L-bracket. A 3/8" drill plus
a 3/8" countersink barely do the job without breaking out.
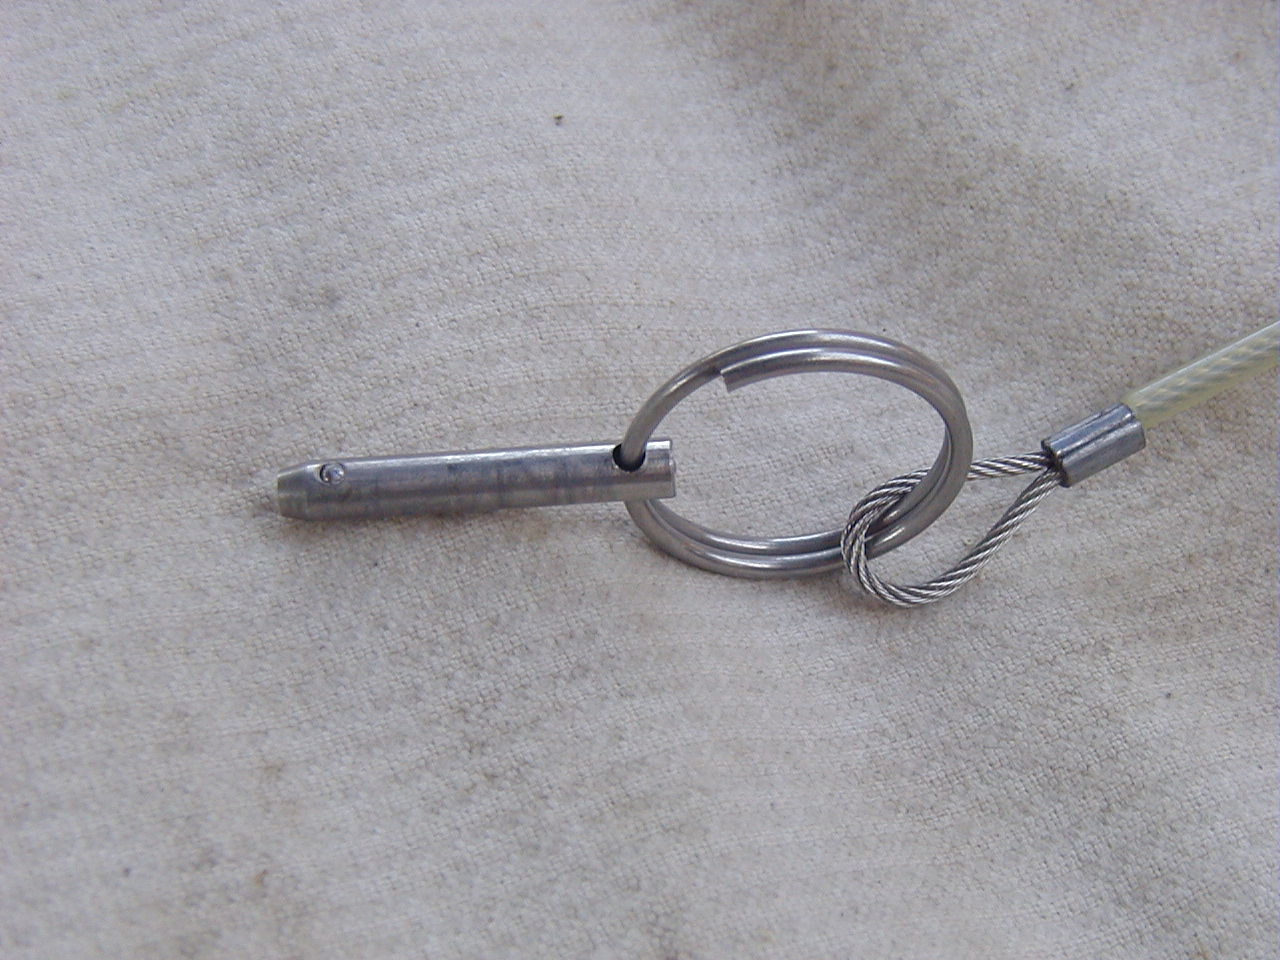
Here's a picture of the clevis.
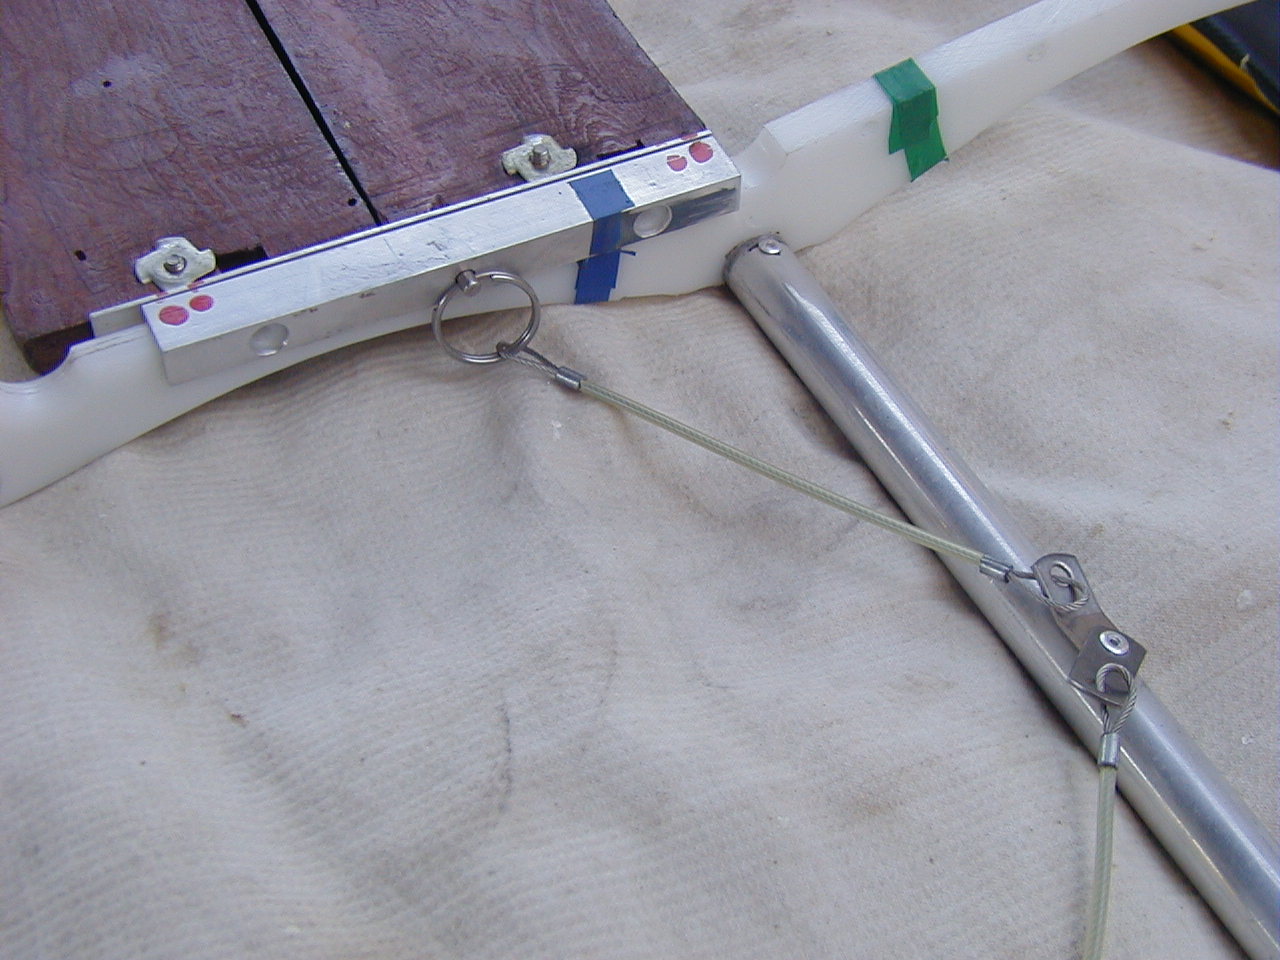
Here is how it fits together. I had to open the hole it the HDPE a
little as the 3/16" reamer left the hole too small to easily insert the
pin. In this photo you can see that I used SS T-nuts to retain the
wooden floorboards to the L-bracket.